



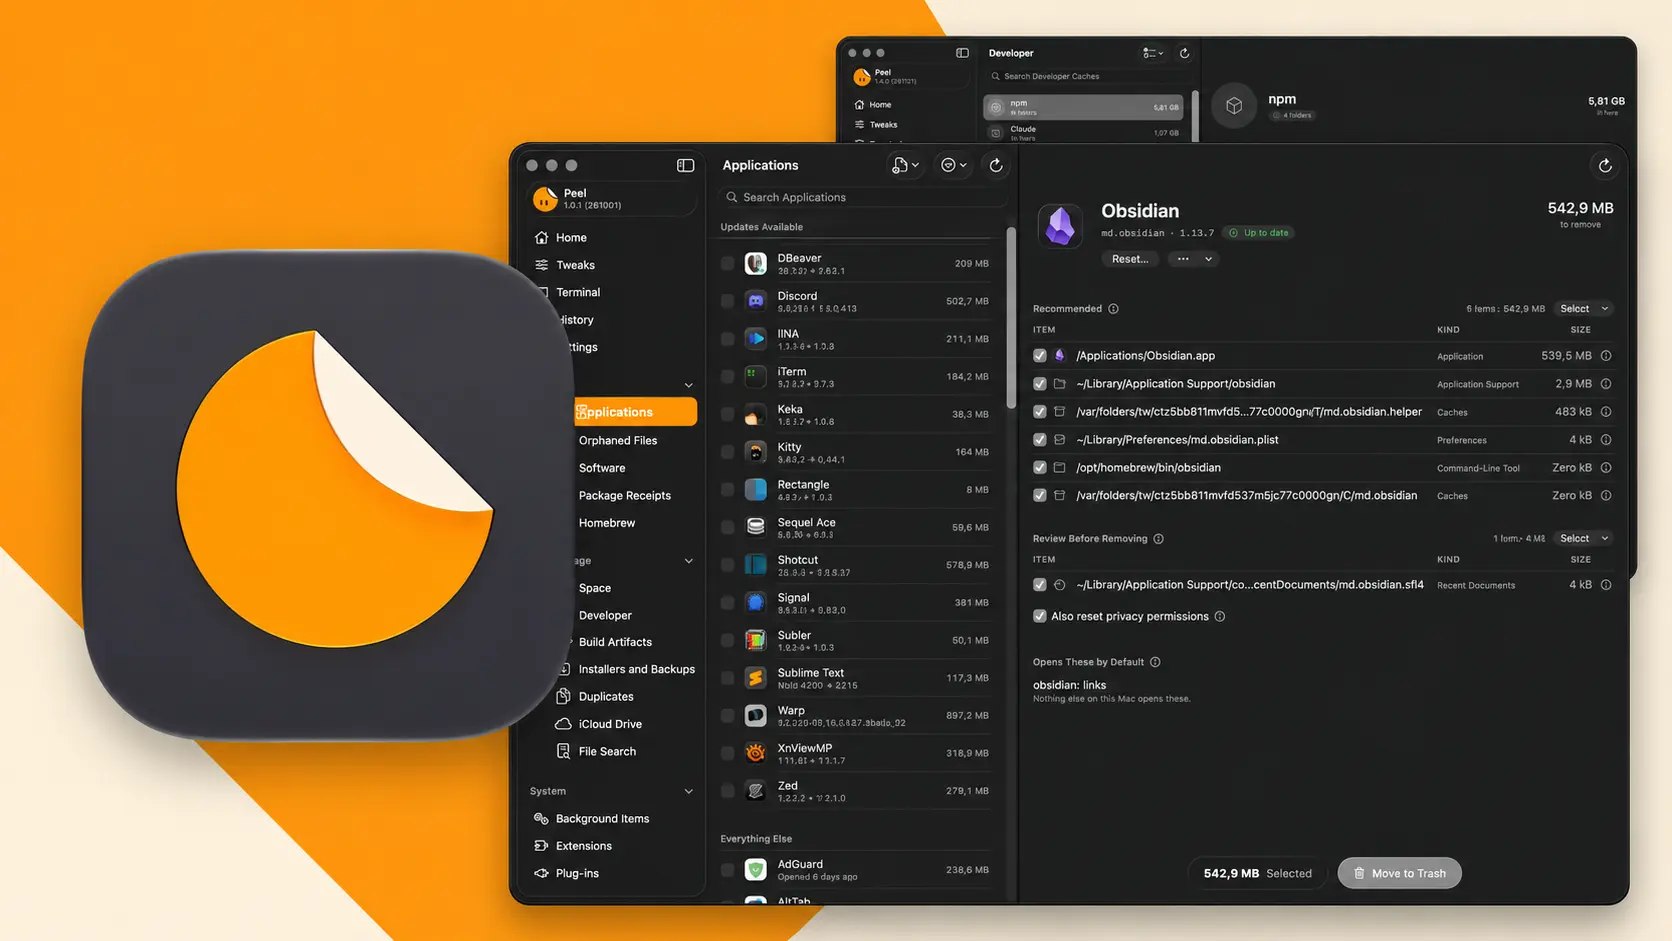
We wrote about AppCleaner a million years ago (2016, to be precise). It’s still a great little utility for uninstalling apps on a Mac, but if you’re looking for a free and open source alternative that does considerably more, check out Peel.
Available for macOS Tahoe 26 and later (including compatible Intel Macs), Peel goes beyond finding and removing leftover files. It gives you a rather detailed look at what applications leave behind, what takes up space on your Mac and what you can actually get rid of. There’s a Homebrew manager in there too, along with a bunch of useful macOS tweaks.
Developed by Țugui Dragoș-Constantin, Peel is written in Swift and released under the GNU GPL version 3 or later. We’re looking at version 1.4.0 (released on November 21, 2026), based on its source code and documentation. The official screenshots in this article are from version 1.0.1.
What actually gets removed when you uninstall an app?
Drag an app from your Applications folder to the Trash and you’re done, right? Well, not exactly. Preferences, databases, caches, plugins and sometimes background services can be scattered across your Mac. Deleting the app itself doesn’t necessarily get rid of any of those.
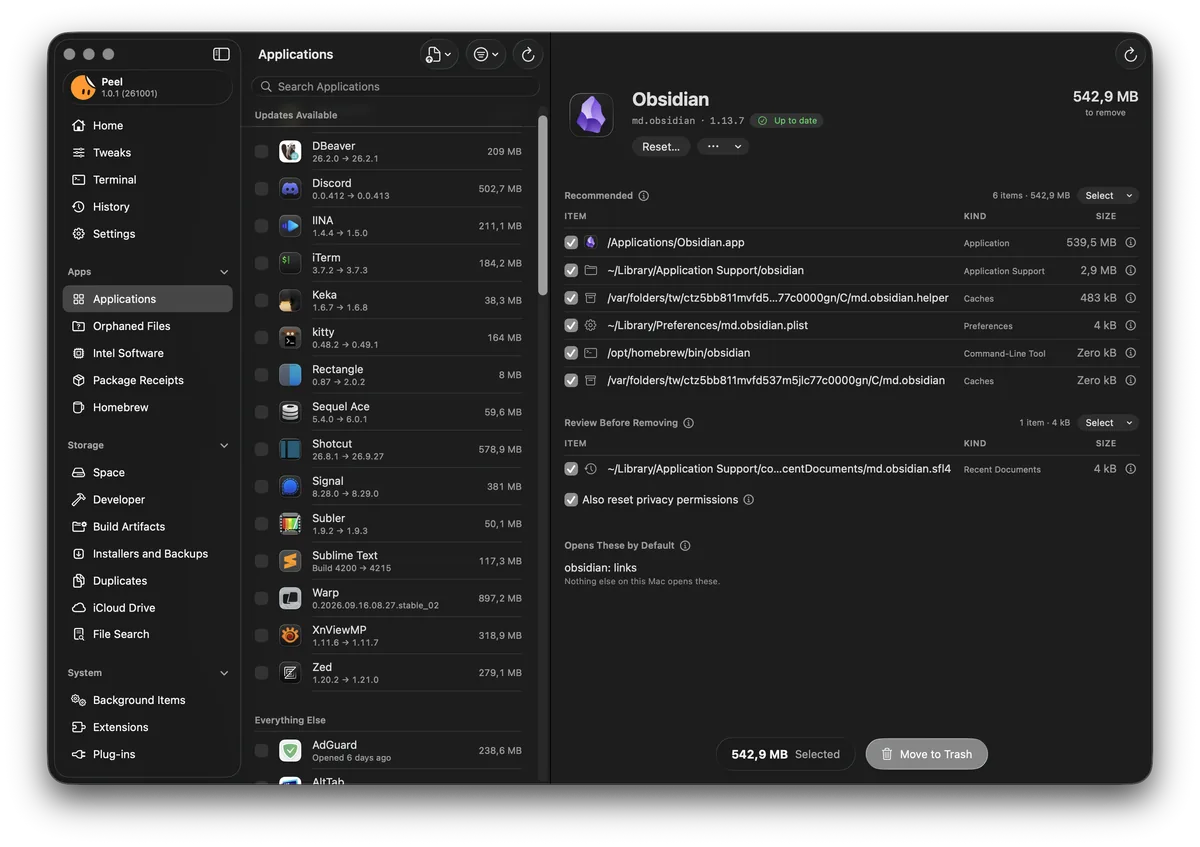
What makes Peel interesting is that it also tells you why it thinks a file belongs to an application. It looks at things like the bundle ID (md.obsidian for Obsidian, for example), the team that signed the app, package receipts and Homebrew installation records. Matches are classified as possible, likely or certain, and other installed apps are taken into account.
A preference file with the exact bundle ID is a pretty good clue. A folder with a vaguely similar name? Not so much. And just because a file belongs to an app doesn’t necessarily mean you want to delete it.
Take a look at the screenshot below. Alongside Obsidian itself, Peel has found a preference file, caches and a Homebrew command. The files are divided into recommended items and Review Before Removing, where you’ll find a recent documents entry in this particular example.
Here’s a more interesting example: say you want to uninstall Microsoft Word but keep Excel. Both apps may use the same Office group container. Peel’s matching logic takes that into account. You wouldn’t want to lose files Excel still needs just because you got rid of Word.
The same goes for your own data. Recognized local chat histories, game saves and virtual machines, among other things, are held back for review. You can also tell Peel to leave specific apps, files and folders alone by adding them to your exclusions in Settings.
What about apps you’ve already deleted? The Orphaned Files view looks for what they left behind using identifiers and records of apps that are no longer installed. If you recognize a folder as belonging to something you still use, select This Belongs To… to assign it to that app (or command line tool as of 1.4.0). Peel stops listing it as an orphan while that software is installed. Nothing in the orphan list is selected by default.
You don’t even have to open Peel every time you want to get rid of an app. There’s an optional Finder extension that adds Uninstall with Peel to the contextual menu. You can also turn on Watch the Trash, which offers to find leftover files when you trash an app yourself. For the latter, Peel needs to be running and have Full Disk Access.
Not all Mac apps should be uninstalled this way, though. Peel 1.4.0 recognizes software such as Karabiner-Elements, Backblaze and Bitdefender Antivirus for Mac and points you to their respective removal procedures. It can even warn you about a trusted root certificate left behind by a debugging proxy such as Charles. If an app has its own uninstaller, use it. That’s also what Apple recommends.
What if you remove something by mistake?
Most files you remove with Peel end up in the Trash. Go to History and you can see where those files came from, put back the ones that are still in the Trash and check which ones couldn’t be moved in the first place.
One thing to watch out for if you also use Mole: its general CLI cleanup attempts to empty your home Trash by default. If you want to keep files there for recovery through Peel, protect the Trash with mo clean --whitelist and preview the cleanup first.
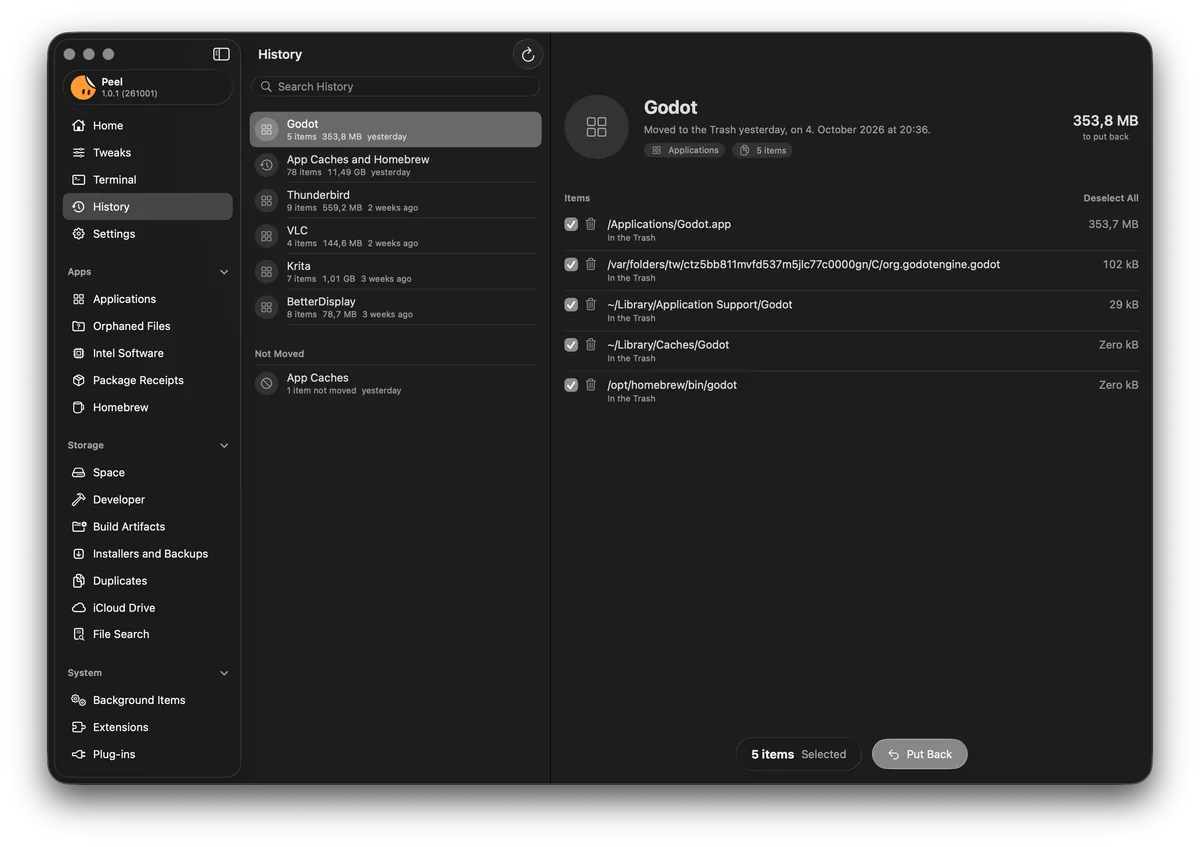
Once you’ve emptied the Trash, you can’t use History to bring those files back. Peel doesn’t keep a separate backup of everything it removes. Some operations, such as resetting macOS privacy permissions, can’t be undone here either. The app will have to ask for permission again.
There’s another little feature in the Applications view worth pointing out: Reset. Ever reinstalled an app to fix an issue only to get the same old problem back? If the problem is in its preferences, deleting and reinstalling the app won’t necessarily help. Peel lets you reset those settings without uninstalling the app, and saves a copy you can restore from Settings > General > Saved Settings. Keep in mind that the saved settings can include account or license information.
How much disk space will you actually get back?
Let’s say you’ve made a copy of a large file on an APFS volume. The original and the copy can share the same physical blocks until the data changes. Deleting one of them might not free anything close to the size Finder shows you. And a sparse virtual disk image may be capable of holding far more data than it currently occupies on your drive.
Peel tries to account for this when working out how much space you could recover. It’s still an estimate (particularly if Peel can’t read all the files), and moving stuff to the Trash won’t free that space until it’s permanently removed.
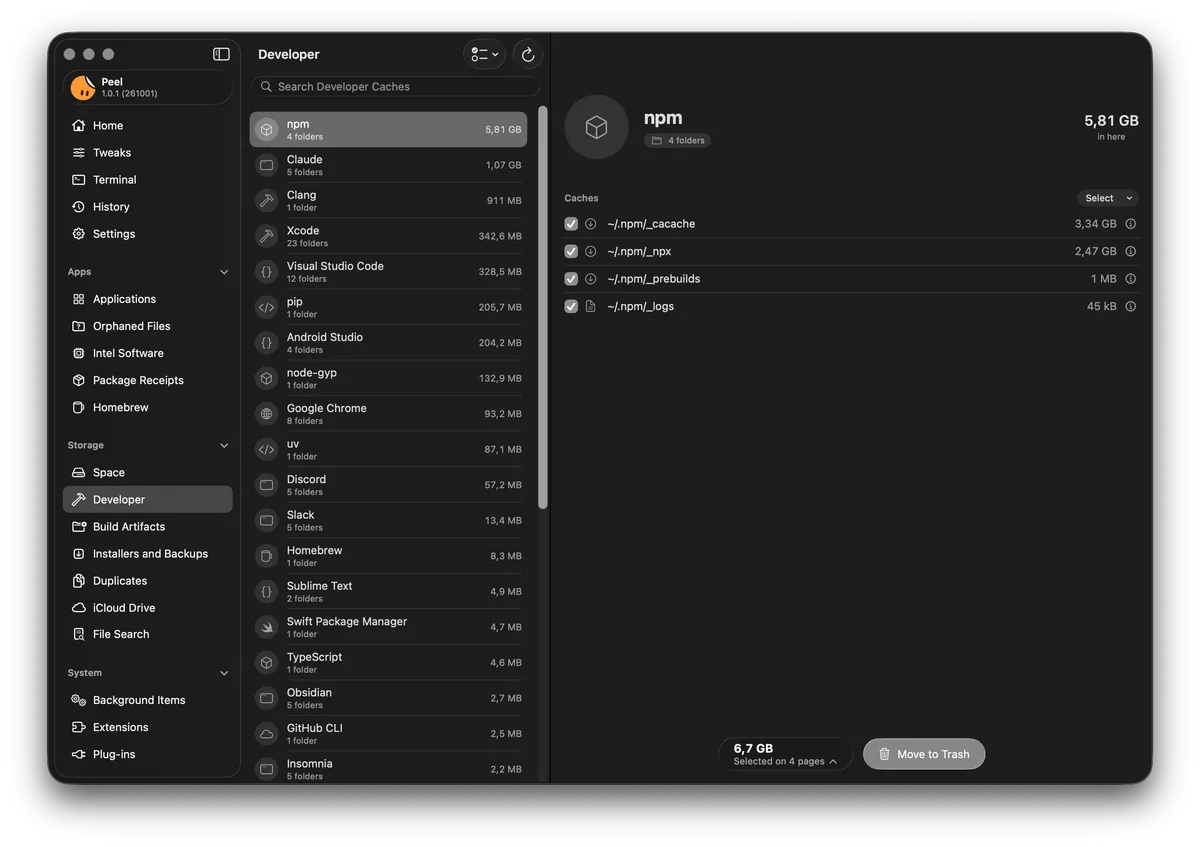
If you use Xcode, npm or similar development tools, check out the Developer view. Instead of having to dig through various directories yourself, you get a breakdown of caches and package stores by tool. There’s also Build Artifacts, which looks for generated files in individual projects. It checks for things like project manifests rather than assuming that anything called target is safe to delete. Recently modified projects and files tracked by Git are kept out of the recommended selection.
Running AI models locally? Those things can take up quite a bit of space. Peel lists individual LM Studio models, while for Ollama it points you towards the appropriate commands for managing the model store (it doesn’t run the commands for you). More importantly, getting rid of a model and getting rid of your chat history are two very different things. As of 1.4.0, recognized AI conversations and recordings aren’t selected automatically when uninstalling their apps.
There are also tools for finding old installers, duplicate files and locally downloaded iCloud Drive files. The duplicate finder compares actual contents using SHA-256, so two files don’t need to have the same name to be identified as duplicates. Peel also leaves files alone in folders it recognizes as syncing to other devices. If your goal is simply to free up space taken by iCloud Drive, use its separate tool to remove local downloads without deleting the files from iCloud.
A GUI for Homebrew
If you use Homebrew, you can manage your formulae and casks directly from Peel. See what’s installed, what needs updating, what depends on what and run maintenance tasks. It can even spot a cask whose app is missing from its expected location. Useful if you’ve ever deleted an app in Finder only to find that Homebrew still thinks it’s installed.
There’s a Scan for Vulnerabilities option too. Under the hood, it uses Homebrew’s brew vulns command and the OSV database to look for known security issues in supported formulae. Note that it doesn’t scan casks or look for malware, and information about the formulae being checked is sent to OSV.
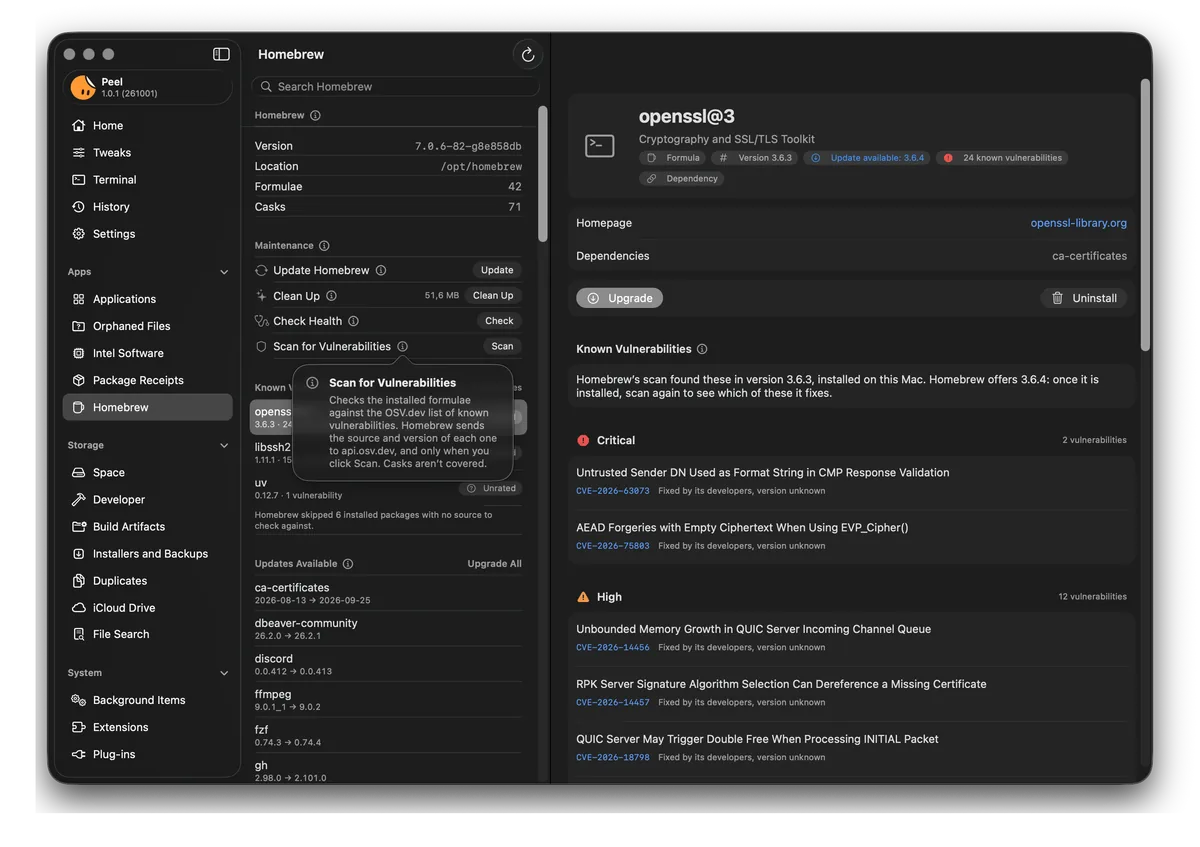
One thing to keep in mind: when you uninstall something or run a cleanup through the Homebrew section, it’s Homebrew doing the work. You can’t use Peel’s History to recover files Homebrew has permanently removed.
Speaking of Homebrew, don’t overlook Export List of Apps in the Applications view. You can get a list of your installed apps, their versions and where they came from in plain text, CSV or JSON. If you have Homebrew 4.4.25 or later, you can export a Brewfile too. Quite handy when moving to a new Mac (and easier than trying to remember every app you had installed on the old one).
Tweaking macOS and Terminal
If you’re wondering why you don’t see all the tools in the sidebar, go to Settings > General > Sidebar and click Choose Tools…. Background Items, Intel Software and Terminal are hidden initially. The first two are useful for finding out what’s running in the background and which apps still rely on Rosetta.
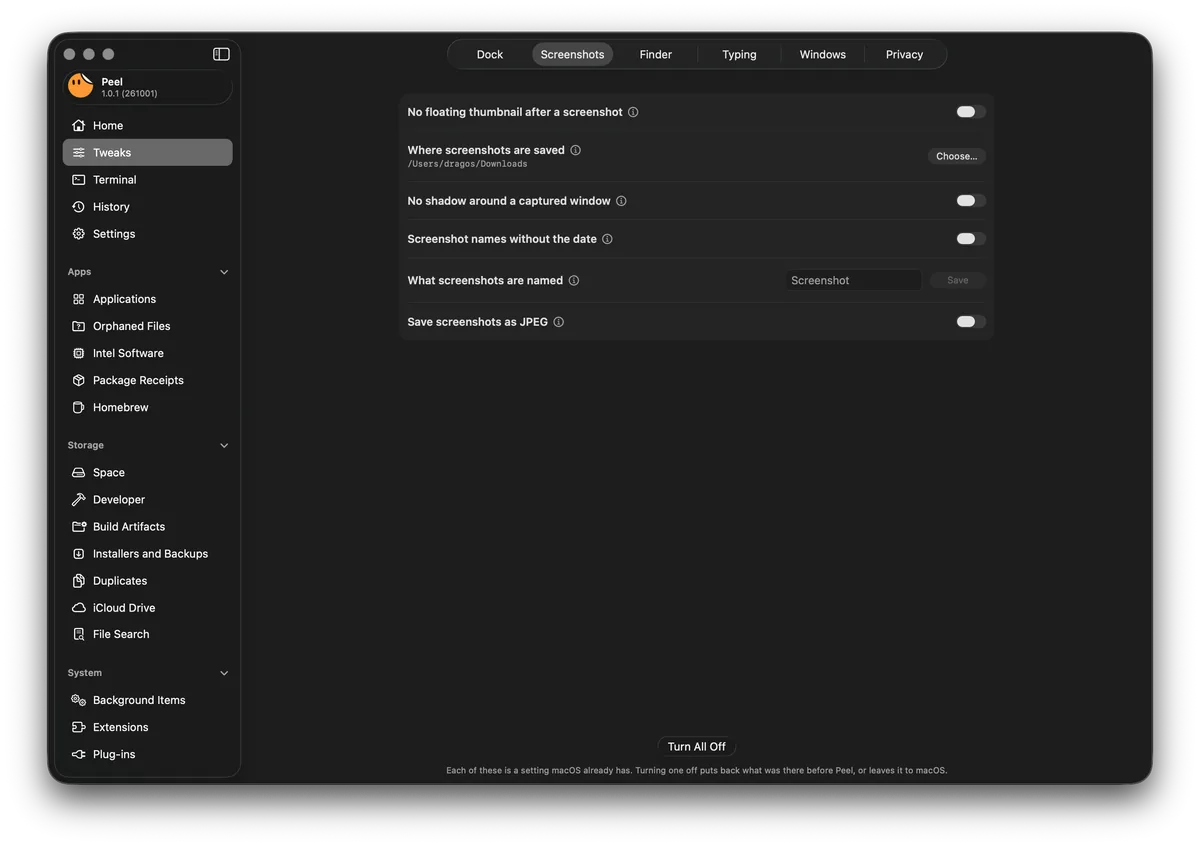
As for Tweaks, you know those little things in macOS that you can change with defaults commands in Terminal? Here you can change things like where screenshots are saved, turn off that floating screenshot thumbnail or have Finder show all file extensions. Peel remembers the original values if you want to go back.
And, of all things, an app uninstaller comes with 29 dark themes for Apple’s Terminal app. There’s also a GUI for configuring aspects of zsh, Git and SSH. If you’re only interested in the themes, they’re available separately. Check out the Terminal documentation on GitHub.
A few words about privacy and permissions
You can use Peel without Full Disk Access, but don’t expect it to find everything. macOS restricts access to certain directories. Peel also uses the App Management permission to move other developers’ apps to the Trash, and there’s an optional privileged helper for files that require administrator access. There’s no need to grant every permission if you don’t use the features that require them.
There’s no account to sign up for and, according to Peel’s privacy documentation, no analytics. Keep in mind, however, that its automatic update checks do connect to external services. Taken together, the requests can reveal which supported apps you have installed to services such as GitHub and Apple. You can see the documented network destinations in Settings > Privacy and turn off automatic checks if you prefer. Just don’t forget to check for Peel updates yourself.
Speaking of updates, make sure you’re running at least version 1.4.0. It contains some important security fixes, including stricter rules for moving or restoring macOS system settings and services, limits on the permissions inherited by subprocesses, and authentication of History records with a key stored in Keychain. Given the sort of access an app like this can have to your Mac, these fixes matter.
Should you replace AppCleaner with Peel?
If all you want to do is uninstall an app every now and then, there’s nothing wrong with sticking to AppCleaner. It’s small, it does one thing and it supports older versions of macOS. And, as mentioned earlier, neither app should replace a dedicated uninstaller when one is required.
There’s also Pearcleaner, another free app with features such as orphan scanning and Homebrew management. Its source code is available under Apache 2.0 with the Commons Clause, which places restrictions on selling the software that Peel’s GPL license doesn’t. Development is listed as on hold in its GitHub repository. Worth keeping in mind if you’re specifically looking for free and open source software.
Peel gets a lot more interesting if you’re the sort of person who installs apps to see what they’re all about, uses Homebrew or spends time with developer tools. But the most appealing thing about Peel is still the way it explains its file matches. A big number telling you how many gigabytes you could clean up doesn’t tell you whether you actually should remove those files. As for whether Peel finds more leftovers than AppCleaner, we’d need to test both on the same installations to answer that.
Want to give it a go? You can download Peel from its GitHub releases page or install it via Homebrew:
brew install --cask peelAnd if you’d rather stay in Terminal, the Homebrew installation also gives you the peel command. For example, here’s how to get a list of Obsidian’s associated files and the reasons they were matched, without moving anything:
peel leftovers ObsidianFor more on the CLI, as well as all the other things you can do with the app, see the Peel user guide.