


You might want to change the NTP server address on your Mac.
The Time Network Protocol or NTP is a standardized way for devices to synchronize their clocks over the internet. Accurate time is crucial for file timestamps, secure connections, and scheduled tasks.
macOS, out of the box, points to Apple’s own NTP server ( time.apple.com ) to fetch the correct date and time. While this might seem trivial, each time your Mac contacts time.apple.com, it reveals your device’s public IP address along with timestamps of those requests. This tells Apple that the device is up and running your rough geographic location, and usage patterns.
You might prefer not to beacon your Mac’s address and timing details to a single, centralized service. Luckily there’s a decentralized alternative and it’s super easy to switch to it.
The NTP Pool Project is a global, volunteer-run cluster of time servers. The pool is being used by hundreds of millions of systems around the world. It’s the default “time server” for most of the major Linux distributions and many networked appliances.
Benefits
- Anonymity by Distribution: Your requests go to many different servers around the world, making it harder to profile your specific machine.
- Redundancy & Reliability: If one server is down, another steps in—no single point of failure.
- Global Reach: Servers in multiple regions ensure that you connect to a nearby node, keeping latency low.
Potential Drawbacks
- Occasional Latency Spikes: Rarely, you might hit a farther server and see a slight time offset until the system corrects.
- Uneven Server Performance: Volunteer servers vary in speed and uptime, though the pool’s monitoring keeps underperformers out.
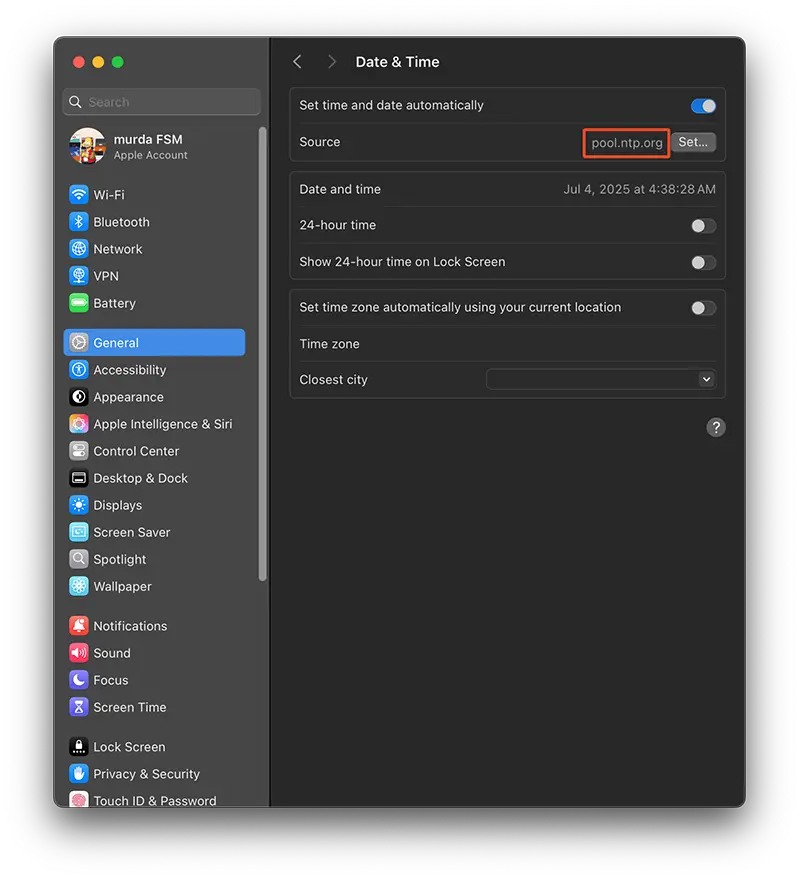
To switch the NTP server on macOS, all you have to do is open the System Settings app and then navigate to General > Date & Time > click the “Set…” button > enter your password > change the source to pool.ntp.org
 To check that everything is up and running, you can run this command in your terminal:
sudo sntp -sS pool.ntp.org
By the way…. in case you’ve missed it, here’s how to enable Touch ID for sudo commands.
